
Inventory
Item Transfer
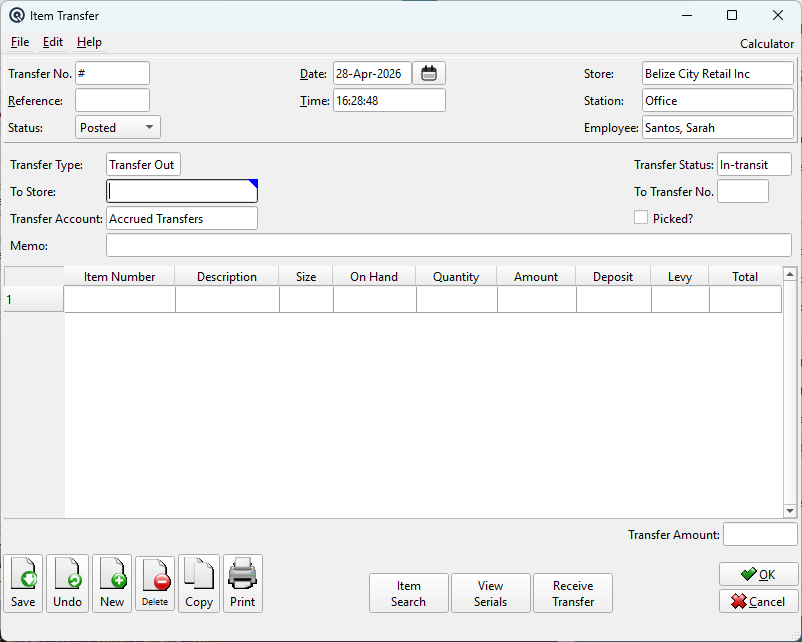
The Item Transfer moves inventory between stores using a two-transaction model: a Transfer Out (sending side) and a linked Transfer In (receiving side). Stock leaves the sending store immediately when the Transfer Out is saved. Goods remain in transit until the receiving store confirms receipt by clicking Receive Transfer. Access from Inventory › Item Transfer or from the Item Transfer List.
Transfer Lifecycle
|
Understanding the Two-Transaction Model Every transfer creates a pair of linked transactions: 1. Transfer Out — Created at the sending store. Removes items from the sending store's inventory. The Transfer Account (an asset clearing account) is debited, and the item asset accounts are credited. Status is In-transit. 2. Transfer In — Automatically generated as the linked counterpart at the receiving store. This transaction is initially unposted and acts as a pending receipt. No inventory movement occurs at the receiving store until someone clicks Receive Transfer. 3. Receive — Clicking Receive Transfer posts the Transfer In, which adds the items to the receiving store's inventory and reverses the clearing account. Status changes to Received on both sides. |
Header Fields
Transfer No.Auto-generated transaction number. Each side of the transfer (Out and In) has its own number. Sequence numbering is by store. DatePosting date. For Transfer Out, this is the ship date. For Transfer In, this is the receipt date (set when received). StoreThe store that owns this side of the transfer. For Transfer Out, this is the sending store. For Transfer In, this is the receiving store. EmployeeAuto-filled from the current session for audit trail purposes. StationAuto-filled from the current session for audit trail purposes. |
Transfer Details
Transfer TypeRead-only. Displays Transfer Out or Transfer In to indicate which side of the transfer you are viewing. Transfer StatusRead-only. Shows In-transit while goods are between stores, or Received after the receiving store has confirmed receipt. To Store / From StoreThe label changes based on the transfer type. On a Transfer Out, it reads To Store (the destination). On a Transfer In, it reads From Store (the origin). Changing the To Store validates that all items are stocked there — items not stocked prompt for removal. To/From Transfer No.Read-only. The linked transaction number on the other side. Click to navigate to the counterpart transfer. Transfer AccountThe GL clearing account used to hold inventory value while goods are in transit. Defaults from the store's Transfer Account setting. This account balances to zero once the Transfer In is received. Picked?Checkbox indicating the items have been physically picked for shipment. Set on the sending side; displayed read-only on the receiving side. MemoFree-text field (40 characters) for shipping notes, carrier references, etc. Editable only on the Transfer Out side. The Transfer In displays the sending store's memo as read-only. |
Sending Side (Transfer Out)
|
What the sender can do: • Add items to the transfer by scanning or typing item numbers. The items table is fully editable on the Transfer Out side. Columns: Item Number — Scan or type; lookup opens on partial match. |
Receiving Side (Transfer In)
|
What the receiver sees: The Transfer In is a read-only view of the transfer. The items table, stores, account, and memo are all locked. The receiver can only: • Review the items, quantities, and amounts being received. The receiver cannot edit quantities, add or remove items, change the store, or modify the transfer account. This ensures that the sending and receiving sides always match. |
Transfer Amount & Price Levels
|
The value of transferred inventory depends on the sending store's Price Level setting: Cost — Items transfer at FIFO/weighted average cost. The Transfer Amount equals the inventory cost value. The Transfer Amount at the bottom of the screen shows the total value of the transfer. |
Validation Rules
|
• Items must be stocked at both the sending and receiving stores. Items not stocked at the receiving store prompt for removal. |
Action Buttons
Item SearchOpens a search dialog to find items within the transfer by number or description. View SerialsDisplays serial numbers assigned to items in this transfer. Allows editing serial assignments. Receive TransferPosts the receiving side (Transfer In), adding items to the receiving store's inventory and changing the status to Received on both sides. Disabled once received. Only visible on the Transfer Out when the linked Transfer In exists but is unposted. Prints the transfer document. After saving, a prompt asks whether to print. |
GL Posting Logic
|
Transfer Out (sending): • Credit each item's Asset Account (removes inventory value). Transfer In (receiving): • Debit each item's Asset Account (adds inventory value at the receiving store). After both sides are posted, the Transfer Account nets to zero for the transfer. |