
Setup & Configuration
Store Master
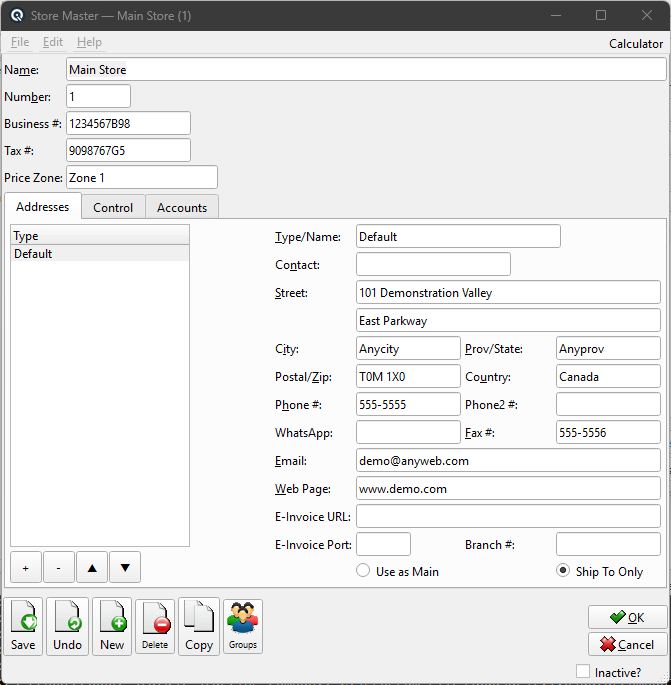
The Store Master defines or edits a physical store location within your organization. Each store has its own addresses, ledger settings, and linked accounts. Access this screen from Setup › System › Stores, then click New or Edit.
|
General
NameThe name given to the store (e.g., "Main Street Store"). NumberA unique number assigned to the store for identification. Business #The business registration number for the store. Tax #The tax identification number (TIN/GST/VAT number) for the store. Price ZoneThe pricing zone this store belongs to. Price zones allow different store locations to sell the same item at different regular prices. For example, urban stores may have higher pricing than rural locations due to operating costs. Each zone can also define its own rounding rules to enforce consistent price endings (e.g., all prices ending in .99 or .95). When an item's regular price is set, it is defined per zone. If you change a store's zone, Quasar will prompt you to autofill prices for stocked items in the new zone. See Price Zone Master to create and manage zones. TabsThe screen is organized into tabs for addresses, control settings, and accounts. |
Addresses Tab
|
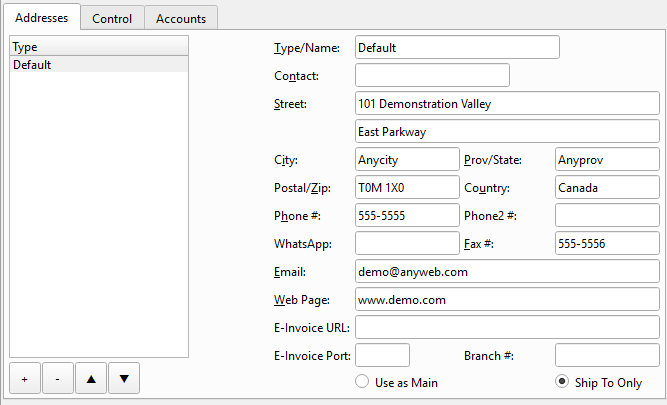
A store can have multiple addresses (mailing, shipping, head office, etc.). Use the Add, Delete, Up, and Down buttons to manage the address list. Select an address to edit its details inline.
Address EditorThe address editor displays and edits the store's addresses. Use the Add, Delete, Up, and Down buttons to manage the list, and select an address to edit its details inline. Type/NameA label identifying the address (e.g., “Main”, “Mailing”, “Warehouse”). Must be unique per store. ContactContact person at this address. StreetStreet address. A second line is available for suite, unit, or building information. CityCity name. Prov/StateProvince, state, or region. Postal/ZipPostal code or ZIP code. CountryCountry name. Phone #Primary phone number. Phone2 #Secondary phone number. Fax #Fax number. WhatsApp phone number for business messaging. Email address. Web PageWebsite URL. E-Invoice URLElectronic invoicing endpoint URL for B2B e-invoice delivery. E-Invoice PortPort number for the e-invoice endpoint. Use as MainDesignate this as the primary address for correspondence and invoicing. Ship To OnlyMark this address as a shipping destination only (not used for billing). Branch #Branch location number used for multi-location reporting. |
Control Tab
Start of Fiscal YearThe first day of your fiscal accounting year. Required for financial statements and year-end processing. Date Ledger is ClosedNo transactions may be posted on or before this date. Set this after completing a period to prevent accidental entries. Start of Work DayThe time that marks the start of the business day for this store. Tender Reconcile TimeDaily — requires that each business day be reconciled before proceeding to the next. This is strictly enforced: at the Point-of-Sale, you cannot perform a ring-off for a subsequent day if unreconciled transactions exist from a previous day. Use this setting to ensure cash is balanced every day without exception. Periodically — allows reconciliation on a flexible schedule without daily enforcement. Days may be left unreconciled and caught up at a later time. Tender Reconcile MethodStation — cash reconciliation is balanced by POS station. Employee — balanced by employee or cashier. This selection determines the type of the Safe and Forward fields below. When set to Station, you will see Safe Station and Forward Station selectors. When set to Employee, those fields change to Safe Employee and Forward Employee selectors instead. Statement Start DayThe day of month customer statements begin (e.g., 1 for the 1st). Year End TransferDisplays the journal entry transaction number created when the preliminary year-end process transfers P&L balances to retained earnings. Read-only. Cheque Payment MethodHand Written — cheques are written manually and not queued for printing. System Generated — cheques are generated by Quasar and queued in the cheque printing screen. Credit/Debit or Online — payments are electronic. Transfer Price LevelControls the price at which inventory is valued when transferred between stores. Quasar's Item Transfer screen allows stock to be moved from one store location to another, either manually or through auto-generated orders. The receiving store records the transfer at the price level specified here. Available options: Cost — items are transferred at their current average cost. This is the most common setting and keeps inventory valuation straightforward between locations. Regular — items are transferred at their regular selling price. This treats the transfer like an internal sale between stores. Level 1 through Level 4 — items are transferred at the corresponding price level defined in the item's pricing. This allows stores to use negotiated or wholesale pricing tiers for internal transfers. Cost+ — items are transferred at cost plus a percentage markup. When selected, the Transfer Cost+ % field appears, allowing you to specify the markup percentage. This is commonly used when a central warehouse supplies satellite stores and needs to recover overhead costs. For details on setting up and processing inventory transfers, see Store Transfers in the User Guide. Transfer Cost+ %The percentage markup applied when Transfer Price Level is set to Cost+. Hidden when another price level is selected. Tax SchemeThe tax scheme used for e-invoicing (TAX, VAT, or GST). Determines the tax category codes used in electronic invoice documents. |
Cash Reconciliation
These settings control how daily cash and tender reconciliation is performed for this store. For a complete walkthrough of the process, see Day End Processing in the User Guide.
Safe StoreStation — cash reconciliation is balanced by POS station. Employee — balanced by employee or cashier. This selection determines the type of the Safe and Forward fields below. When set to Station, you will see Safe Station and Forward Station selectors. When set to Employee, those fields change to Safe Employee and Forward Employee selectors instead. Safe StoreDuring the cash reconciliation process, tendered funds are transferred from each station or employee to a designated Safe. The Safe Store determines which store location receives these funds. If each location handles its own bank deposits, set this to the current store. In cases where a satellite location (such as a gas station on the lot of a main store) does not make independent deposits, set the Safe Store to the main location so that funds are transferred there to be verified and deposited. Safe StationThe station within the Safe Store that represents the physical safe. Although the safe is a physical location where tenders are secured, the system tracks it as a station that holds the funds until they are deposited at the bank or transferred to another location. Safe EmployeeThe employee within the Safe Store who represents the physical safe. Although the safe is a physical location where tenders are secured, the system tracks it as an employee who holds the funds until they are deposited at the bank or transferred to another location. Forward StoreThe store to which the safe's funds are automatically forwarded at the start of each business day. In most cases this is set to the current store. In a multi-store environment where a satellite location transfers its cash to a central location, set this to the main store. Forward StationThe station responsible for daily cash control. In most multi-lane retail environments, one central station manages all cash exchanges — providing coins and small bills to cashiers, collecting excess funds, and preparing bank deposits. Although the cash is physically held in the safe overnight, the system automatically transfers the safe's balance to this station each morning so that it is fully accountable for all funds throughout the business day. Forward EmployeeThe employee responsible for daily cash control. In most multi-lane retail environments, one designated employee manages all cash exchanges — providing coins and small bills to cashiers, collecting excess funds, and preparing bank deposits. Although the cash is physically held in the safe overnight, the system automatically transfers the safe's balance to this employee each morning so that they are fully accountable for all funds throughout the business day. |
Accounts Tab
|
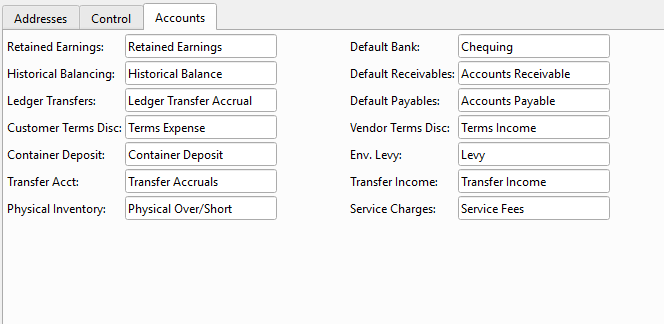
Default accounts used by this store for automated postings.
Retained EarningsEquity account showing current profit/loss on the balance sheet. Historical BalancingOffsetting account used when posting opening balances for customers, vendors, and inventory. Ledger TransfersAccrual account for ledger balance transfers between stores. Default BankDefault bank account for cheques and bill payments. Default ReceivablesDefault AR account assigned to new customers. Default PayablesDefault AP account assigned to new vendors. Customer Terms DiscExpense account for early payment discounts given to customers. Vendor Terms DiscIncome account for early payment discounts taken from vendors. Container DepositTracks container deposit purchases and sales. Env. LevyTracks government-mandated environmental levies collected. Transfer AcctThe general ledger clearing account used to balance all types of transfers within Quasar. This includes inventory transfers between stores, tender transfers during the cash reconciliation process, customer and vendor card transfers, and ledger balance transfers. The account acts as a temporary holding account — one side of the transfer debits it and the other side credits it, keeping the books in balance across stores and entities. Transfer IncomeIncome account for transfers not done at cost. Physical InventoryExpense account for inventory adjustments from physical counts. Service ChargesIncome account for service charges on past-due invoices. |
Toolbar Actions
SaveSave changes to the store record. UndoDiscard unsaved changes and restore the original record. NewCreate a new store. If the current record has unsaved changes, you will be prompted to save. DeleteDelete the store record. CopyCopy the store record to create a new store with the same settings. GroupsDefine the groups this store belongs to. OKSave and close. CancelDiscard changes and close. |
Inactive?Toggle on to deactivate the store. Inactive stores are hidden from lookups but their data is preserved. Toggle off to reactivate. |
Related Screens
| Store List | Price Zone Master | Station Master | Chart of Accounts |
| Quasar Accounting 7.1 • © Linux Canada Inc. • Table of Contents |