
Setup & Configuration
Security Type Master
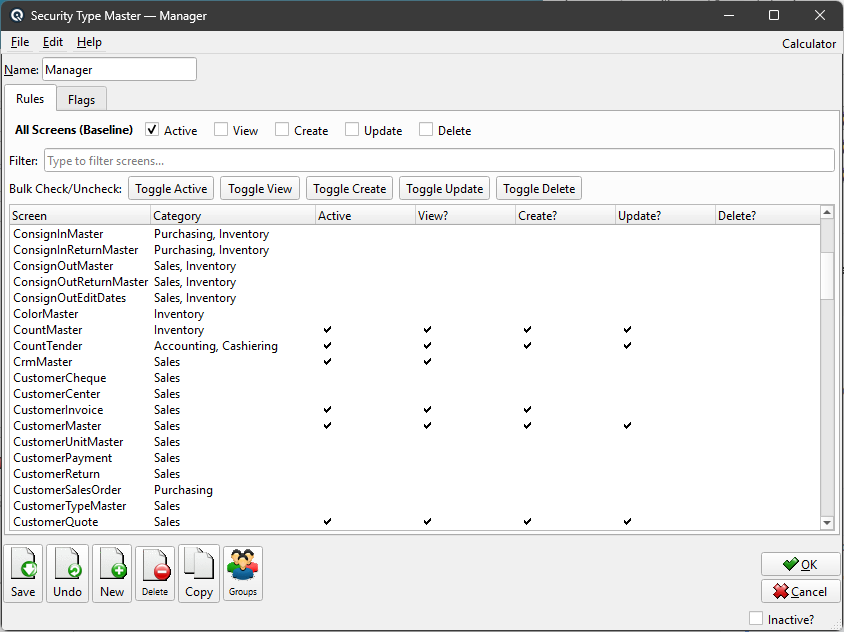
The Security Type Master defines a security profile that controls what users can do in Quasar. Each profile has a name, a set of screen-level access rules with Active/View/Create/Update/Delete permissions, and a set of fine-grained flags for special operations. Assign a security type to users via the User Master. Access from Setup › System › Security Types, then click New or Edit. For a detailed overview see Security in the User Guide.
|
General
NameA descriptive name for this security profile (e.g., "Manager", "Cashier", "Bookkeeper", "Read Only"). |
Rules Tab
|
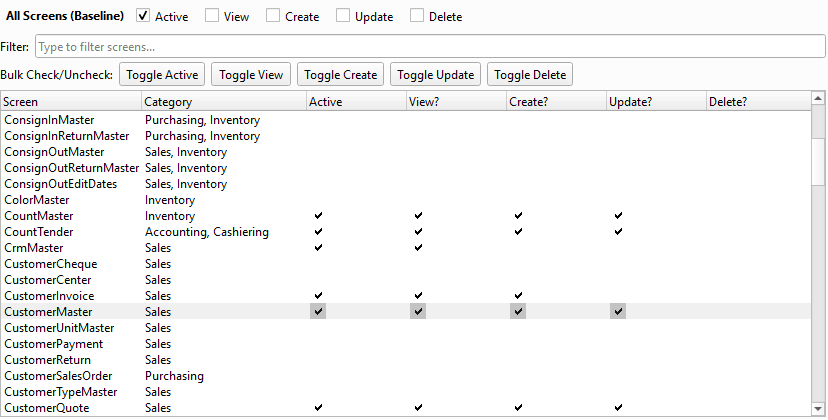
The Rules tab controls access to individual screens. Every registered screen in Quasar is listed here with checkboxes for five permission levels. Security is evaluated as follows: the All Screens (Baseline) row sets the default for every screen, then individual screen overrides take precedence over the baseline.
All Screens (Baseline)Sets the default permission for every screen. Check Active to enable access, then use View, Create, Update, and Delete to control what the user can do. Individual screen rows below override this baseline — if a screen row is marked Active, its permissions take precedence. FilterType text to instantly filter the screen list. Matches against both the Screen name and Category columns, making it easy to find a specific screen in the list. Bulk Check/UncheckToggle buttons that flip all visible (filtered) rows for a given column. For example, clicking Toggle View checks View on all visible rows if any are unchecked, or unchecks them all if they are all currently checked. Available toggles: Active, View, Create, Update, Delete. Screen Rules ChecklistLists every registered screen with the following columns: Screen — the internal screen name (e.g.,
"CustomerMaster", "InvoiceList"). Single-click a checkbox column to toggle it. Checking any permission column automatically marks the row as Active. Field-Level SecurityDouble-click a screen row to open the Field Security dialog for that screen. Not all screens support field-level security — if a screen has no securable fields, the double-click does nothing. |
Field Security Dialog
|
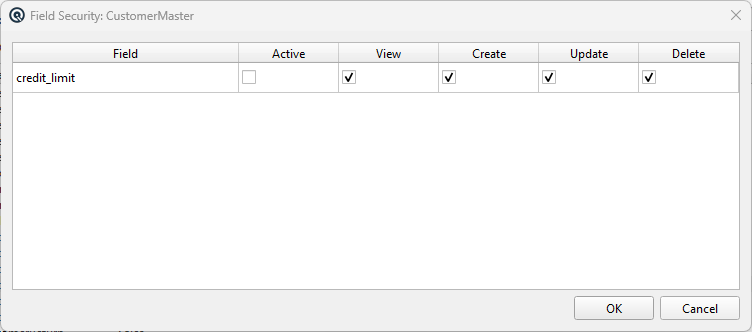
The Field Security dialog lets you set permissions on individual fields within a screen. This provides a layer of control below the screen-level rule — a user may have full access to a screen but be restricted on specific sensitive fields.
|
The dialog displays a table with the following columns: Field — the name of the securable field (read-only).
These are the fields that the screen has registered as eligible for
field-level security control. Clicking any permission checkbox (View, Create, Update, Delete) automatically checks the Active column for that row, ensuring the override is saved. How field rules are evaluated: Field-level rules take the highest precedence. When a user accesses a screen, the system first checks the All Screens baseline, then any screen-specific override, and finally any field-level overrides. For example, you could grant a cashier full View/Create/Update access to the Invoice screen but set the Price field to View-only, preventing price changes. Click OK to save field rules or Cancel to discard changes. Field rules are stored with the security type and take effect the next time a user with this profile opens the screen. |
Flags Tab
|
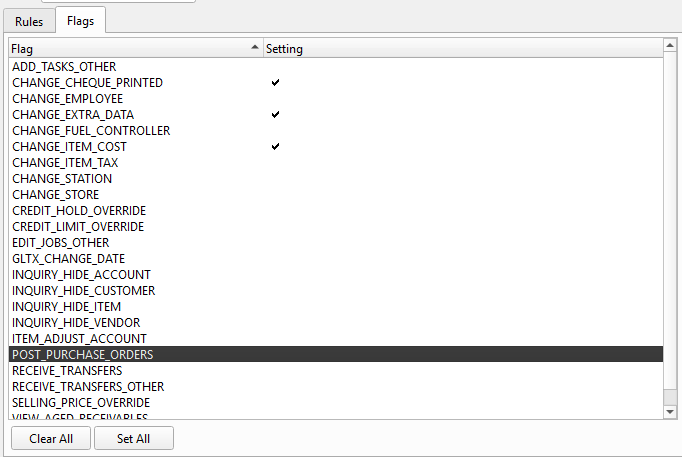
Flags provide fine-grained control over specific operations that go beyond basic screen access. Each flag is a simple on/off toggle.
FlagsEach flag is a simple on/off toggle controlling a specific operation. Click a flag row to toggle it on or off. Clear AllUncheck all flags at once. Set AllCheck all flags at once. Available flags: ADD_TASKS_OTHER — create tasks assigned to other users. |
Toolbar Actions
Save / Undo / New / Delete / CopyStandard master screen actions. OK / CancelSave and close, or discard and close. Inactive?Toggle to deactivate the security type. |