
Accounts & Ledger
Recurring List
The Recurring List displays all recurring (memorized) transactions. Double-click any row to open the Recurring Master and edit the schedule or post the transaction.
|
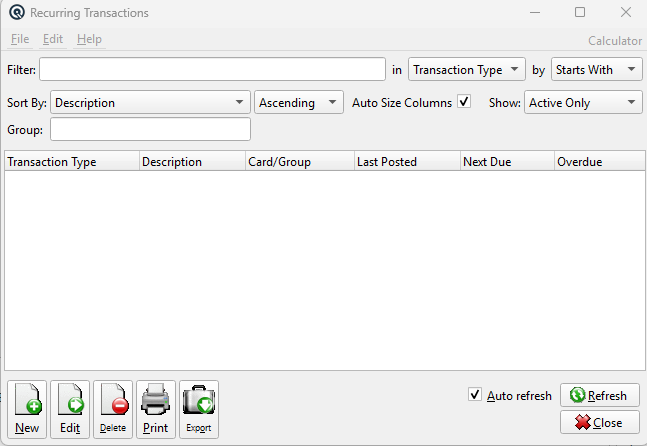
Default Columns
| Column | Description |
| Transaction Type | Type of memorized transaction. |
| Description | Recurring description. |
| Card/Group | Customer/Vendor or group. |
| Last Posted | Date last posted. |
| Next Due | Next posting date. |
| Overdue | Whether overdue for posting. |
Filters
Filter
Quick-search the displayed list. Type text to instantly filter rows by matching against the selected column. Use the in dropdown to choose which column to search, and the by dropdown to switch between Starts With, Contains, or Exact Match.
Tip: If you do not see the column you want to search or view, go to File → Configure to customize which columns are displayed in the list. You can add, remove, and reorder columns to suit your workflow.
Sort Column & Method
Choose the column used to sort the list. The dropdown displays all columns you have chosen to view, including any custom column changes you have made. Use the second dropdown to switch between Ascending and Descending order.
Auto Size Columns
When checked, columns automatically resize to fit their contents each time the list refreshes. This ensures all data is visible without manual adjustment.
When unchecked, column widths are saved between sessions. You can drag column borders to set your preferred widths and they will be remembered the next time you open this screen. This is useful when you want a consistent layout regardless of the data displayed.
Show
Filter records by status. Options include:
• Active Only — Show only active records (default).
• Inactive Only — Show only deactivated records.
• Active & Inactive — Show all records regardless of status.
Group
Filter by group membership. Select a group to show only records that belong to that group. Leave blank to show all records.
Related Screens
| Recurring Master |
| Quasar Accounting 7.1 • © Linux Canada Inc. • Table of Contents |