
Navigation & Interface
Main Window — Tabbed Interface
The Quasar main window provides a modern tabbed interface where all screens open inside a single application window as tabs, rather than as separate floating windows. This keeps your desktop organized and makes it easy to switch between screens. The tabbed interface includes a Navigation Sidebar for quick access to all screens, a Recently Viewed list, split-view and detached-window support for multi-tasking, a context-sensitive Field Help Panel, session restore, and unsaved-changes protection.
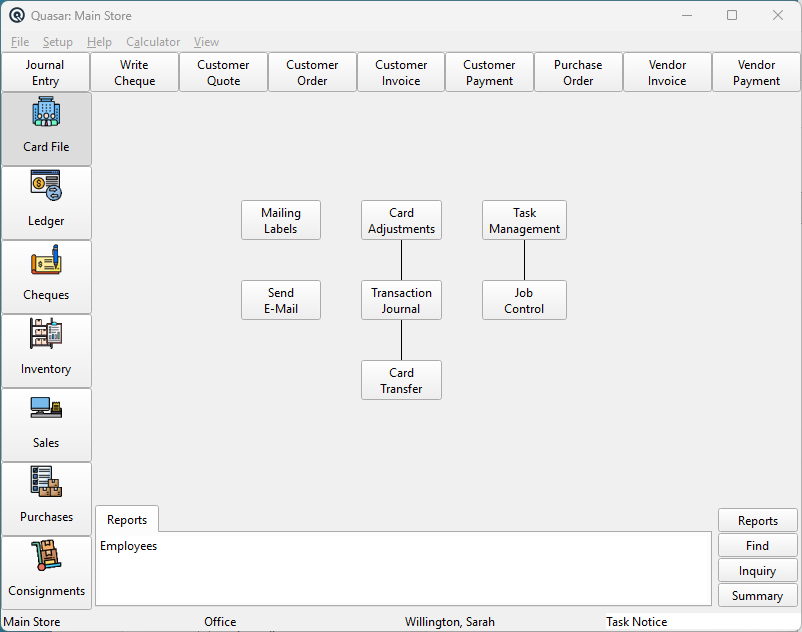
Navigation Sidebar
|
The Navigation Sidebar is a dockable panel on the left side of the main window. It provides instant access to every screen in the application. Toggle it from the View menu or press Ctrl+K to open it and focus the search box. |
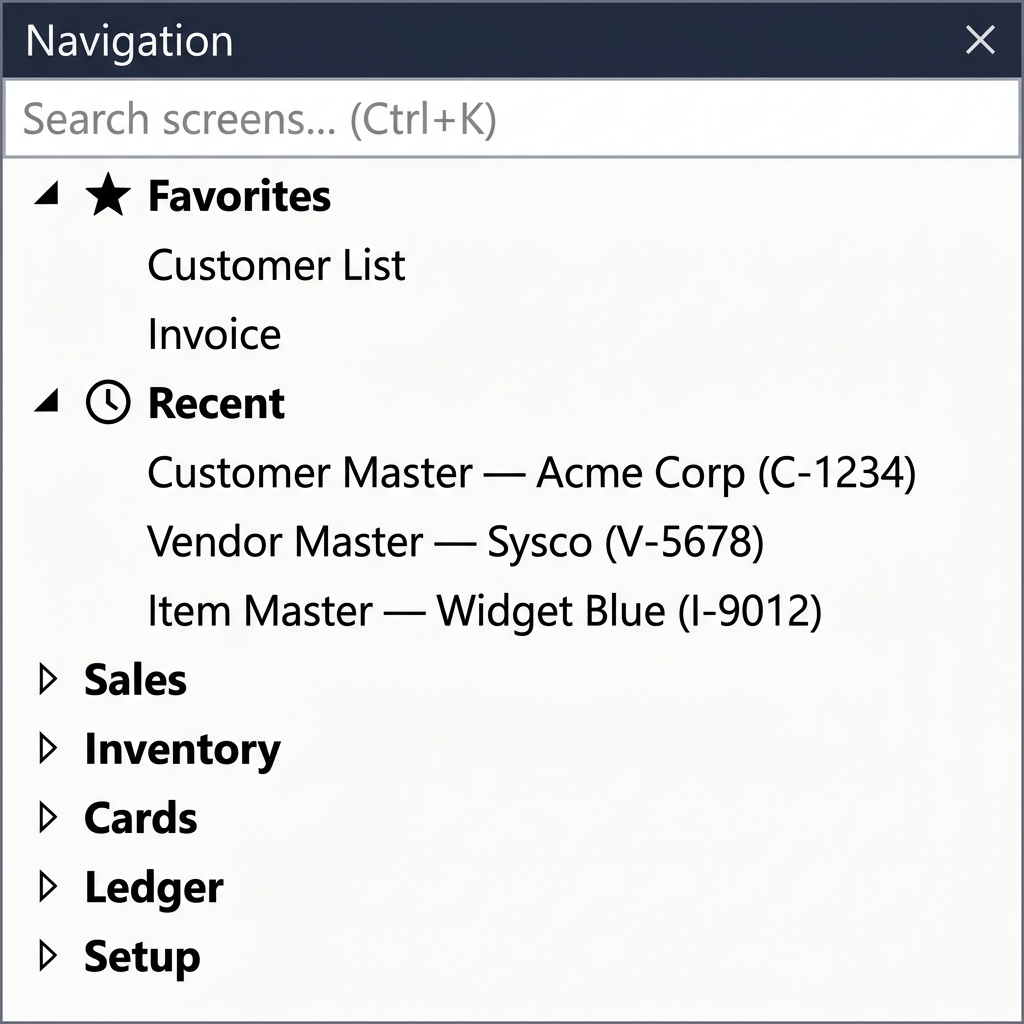
Search
Type in the search box at the top (or press Ctrl+K from anywhere) to instantly filter the tree to matching screens. The sidebar opens automatically if it is hidden when you press Ctrl+K.
Favorites (★)
Right-click any item in the tree and select “Add to Favorites” to pin it to the Favorites section at the top. Right-click a favorite to remove it. Favorites are saved per user and persist across sessions.
Recently Viewed (⏱)
The last 10 screens you opened are automatically tracked in the Recent section. Each entry shows the full screen title including the record name and number (e.g., “Customer Master — Acme Corp (C-1234)”). Click any recent entry to re-open that screen type. The list persists across sessions.
Navigation Categories
Below Favorites and Recent, the tree is organized by module: Sales, Inventory, Cards, Ledger, Setup, etc. Expand a category to see all screens within it. Click any item to open it. Hold Ctrl and click to open it in Pane 2 (split view). Hold Ctrl+Shift and click to open it in a detached floating window.
Navigation Context Menu
Right-click any screen item in the tree to see options:
- ★ Add to Favorites / ☆ Remove from Favorites — toggles the item in the Favorites section.
- Move to… — opens a dialog to move the screen to a different navigation group. Choose from existing groups in the tree.
- Move to New Group… — creates a new custom group and moves the screen into it. You can place the new group at the top level or inside an existing group.
Right-click a group header (e.g., “Sales”, “Inventory”) to see:
- New Group… — creates a new custom group, either at the top level or inside the clicked group.
- Delete Group — removes a custom group and moves all its screens back to their default locations. Built-in groups (System, Ledger, Card, Inventory, Sales, Purchases, Consignment, Setup, Operations) cannot be deleted.
Business Feature Filtering
The navigation tree, toolbar buttons, panel buttons, and menus are automatically filtered based on your company’s enabled business features. Screens for disabled features (e.g., consignment, fleet, patronage) are hidden from the interface entirely. Feature settings are managed in Configuration.
Tab Management
Switching TabsClick any tab to switch to that screen. The Home tab is always present and cannot be closed. Tabs 1 through 9 show circled number indicators (①②③…) matching the Ctrl+1 through Ctrl+9 keyboard shortcuts. Tab TitlesEach tab shows the screen type and, for data screens, the record number and name (e.g., “Vendor Master — Sysco (V-5678)”). Tab titles update live as you change the record name or number. Hover over a tab to see the full title in a tooltip. When tabs are too wide to fit, long titles are automatically truncated with an ellipsis. Duplicate Tab PreventionList screens are singletons: opening a list that is already open simply activates the existing tab instead of creating a duplicate. Master screens (data entry) can have multiple instances open for side-by-side comparison or editing. Tab List DropdownWhen tabs are squeezed for space or you have many open, a dropdown button (▾) appears at the right edge of the tab bar. Click it or press Ctrl+0 to see a list of all open tabs across both panes. While the menu is open, press 1–9 to jump directly to that tab, or 0 for tab 10. The current tab is shown in bold. Closing TabsClick the × button on any tab to close it. If the screen has unsaved changes, you will be prompted to save or discard them. You can also middle-click a tab or press Ctrl+W to close the current tab. Tab Context MenuRight-click any tab to see options: Detach to Window, Split Right (moves tabs after this one to Pane 2), Split Left (moves tabs before this one to Pane 2), Split & Detach Pane, Close Tab. Split options only appear when there are tabs in that direction. When a split pane is active, you will also see Move to Other Pane, Detach Pane / Reattach Pane, and Close Pane. Session RestoreWhen you close Quasar, all currently open tabs are saved. The next time you launch the application, those tabs are automatically re-opened in the background. The Home tab is shown initially — switch to any restored tab to continue where you left off. The navigation sidebar’s expand state, dock positions, and panel visibility are also restored per user. Keyboard Shortcuts
|
View Menu
|
The View menu provides quick access to panel visibility, tab management, and split-view controls:
|
Split View
|
Split view divides the main window into two side-by-side panes, each with its own tab bar. This is ideal for workflows where you need to see a list and a detail screen at the same time. |
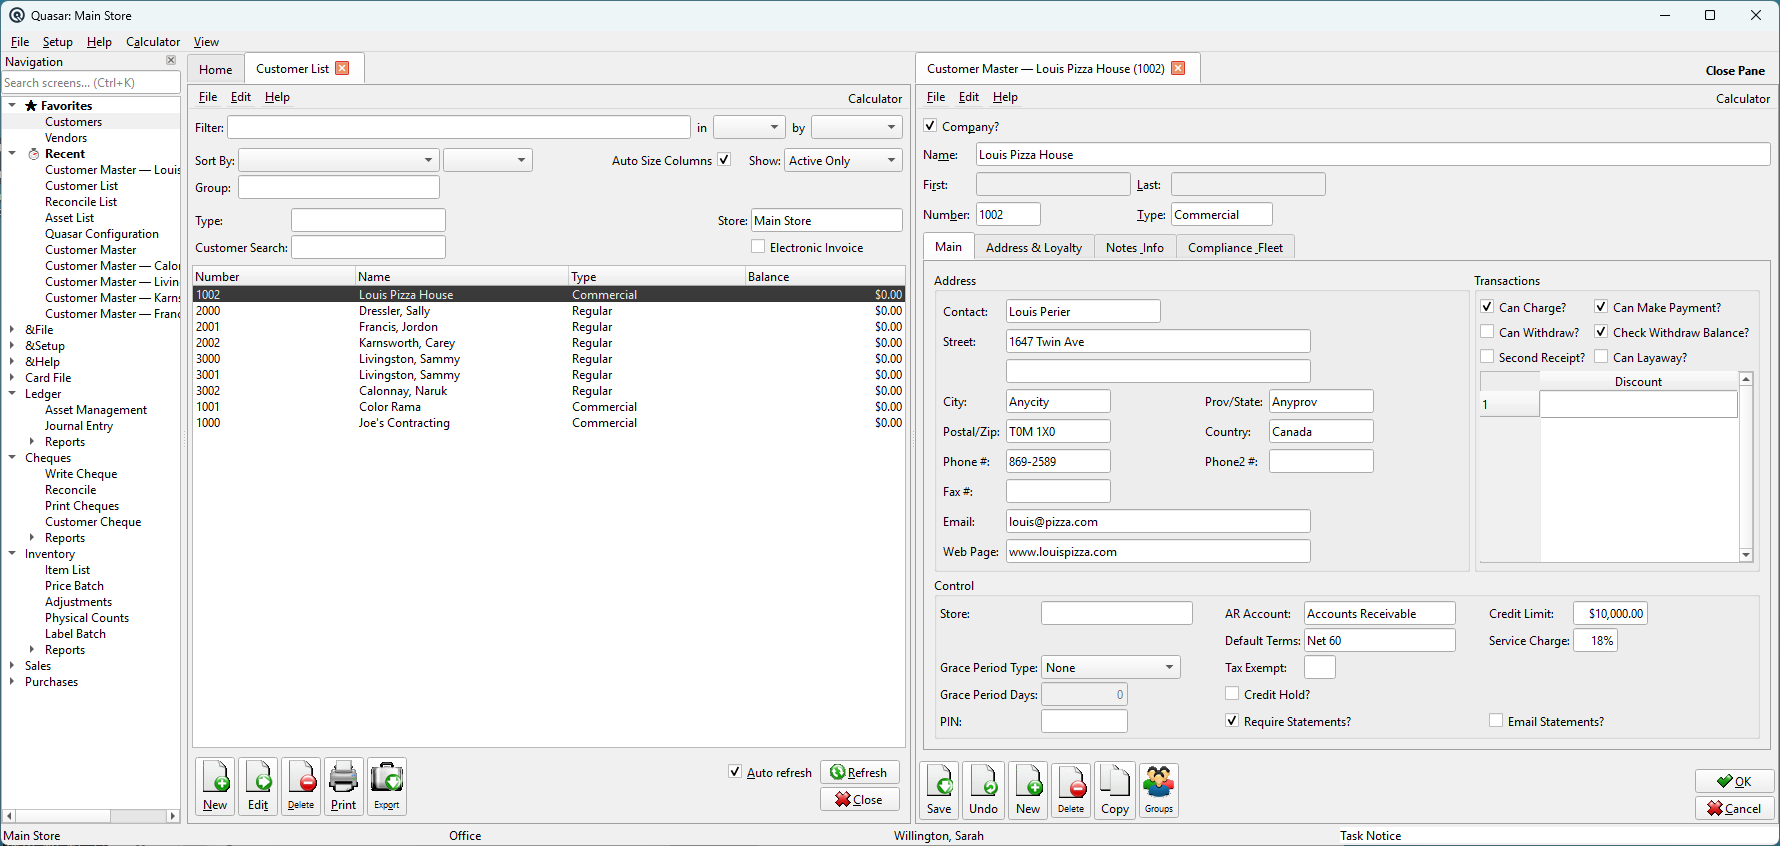
Creating a Split
Right-click a tab and choose Split Right (tabs after the clicked tab move to Pane 2) or Split Left (tabs before the clicked tab move to Pane 2). The clicked tab always stays in Pane 1. Split options only appear when there are at least two non-Home tabs and there are tabs in that direction to split off.
Routing Logic
Screens opened from the Navigation Sidebar go to Pane 1 (left). Screens opened from list screens (by double-clicking a record or pressing Enter) go to Pane 2 (right). Hold Ctrl and click in the Navigation Sidebar to open directly in Pane 2. If a split does not yet exist, Ctrl+Click automatically creates one.
Moving Tabs
Right-click a tab and select “Move to Other Pane” to transfer it between panes.
Closing the Split
Right-click a tab or the empty pane area and select “Close Pane”. You will be asked whether to move remaining tabs back to the main pane or close them all. If any tabs have unsaved changes, you will be prompted to save or discard before closing.
Detached Window
|
For users with dual monitors or smaller screens, the split pane can be detached into its own separate window. This gives you a full-width primary window on one monitor and a full-width secondary window on the other. |
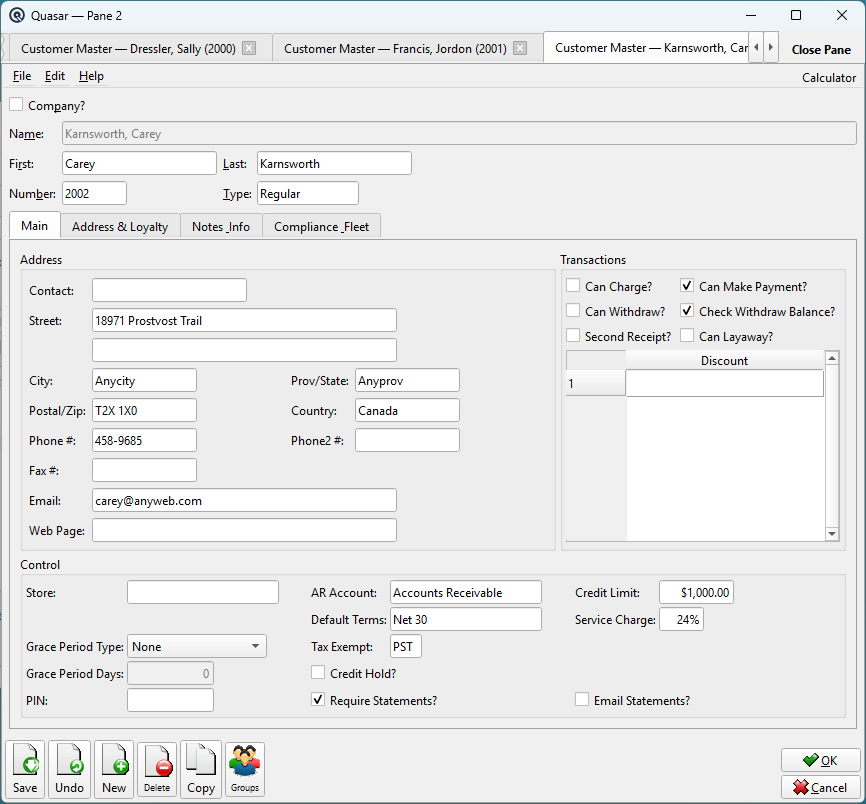
Opening in a New Window
There are three ways to move a screen to its own window:
- Detach to Window — right-click a tab and select “Detach to Window”. The individual screen is removed from the tab bar and opens as a standalone floating window with its own menu bar. A “Return to Tab Bar” action appears in its menu bar to re-embed the screen.
- Split & Detach Pane — right-click a tab and select “Split & Detach Pane”, or press Ctrl+/. This creates a split view and immediately detaches Pane 2 into a separate window. All subsequent list double-clicks and Ctrl+Click navigations route to this window automatically.
- Ctrl+Shift+Click — hold Ctrl+Shift and click a Navigation Sidebar link to open the screen directly in a detached window.
Detaching an Existing Split
If you already have a split pane, right-click any tab or the empty pane area and select “Detach Pane” to lift it into its own window.
Reattaching
Right-click a tab in either window and select “Reattach Pane” to bring the secondary window back into the main window as an embedded split.
Closing the Detached Window
Clicking the window’s × button works the same as closing a split pane: you are asked whether to move tabs back to the main window or close them all.
Unsaved Changes Protection
|
Quasar protects against accidental data loss. If you try to close a tab, a pane, or the entire application while any screen has unsaved changes, you will be prompted to save or discard your edits before the action proceeds. This applies to:
|
Field Help Panel
|
The Field Help Panel is a dockable panel on the right side of the main window. It shows context-sensitive help for the currently focused field or screen. Toggle it from the View → Field Help Panel menu. The panel automatically updates as you move focus between fields, tabs, list columns, checkboxes, and radio buttons. Features:
|
Status Bar
|
The status bar at the bottom of the main window displays four permanent indicators:
Temporary messages (e.g., “Pane is already detached”, “No tab to detach”) also appear briefly in the status bar. |
Related Screens
| Calculator |
| Configuration |
| User Master |
| Security Type Master |
| Quasar Accounting 7.1 • © Linux Canada Inc. • Table of Contents |